On Thursday, December 12th, WordPress announced the arrival of its latest release which most notably features a completely redesigned back end interfaced. The update, which has changed the administrative look drastically, has been dubbed by the folks at WordPress as “the most beautiful update yet”. On the front end there little to no changes that will effect your website.
What’s new?
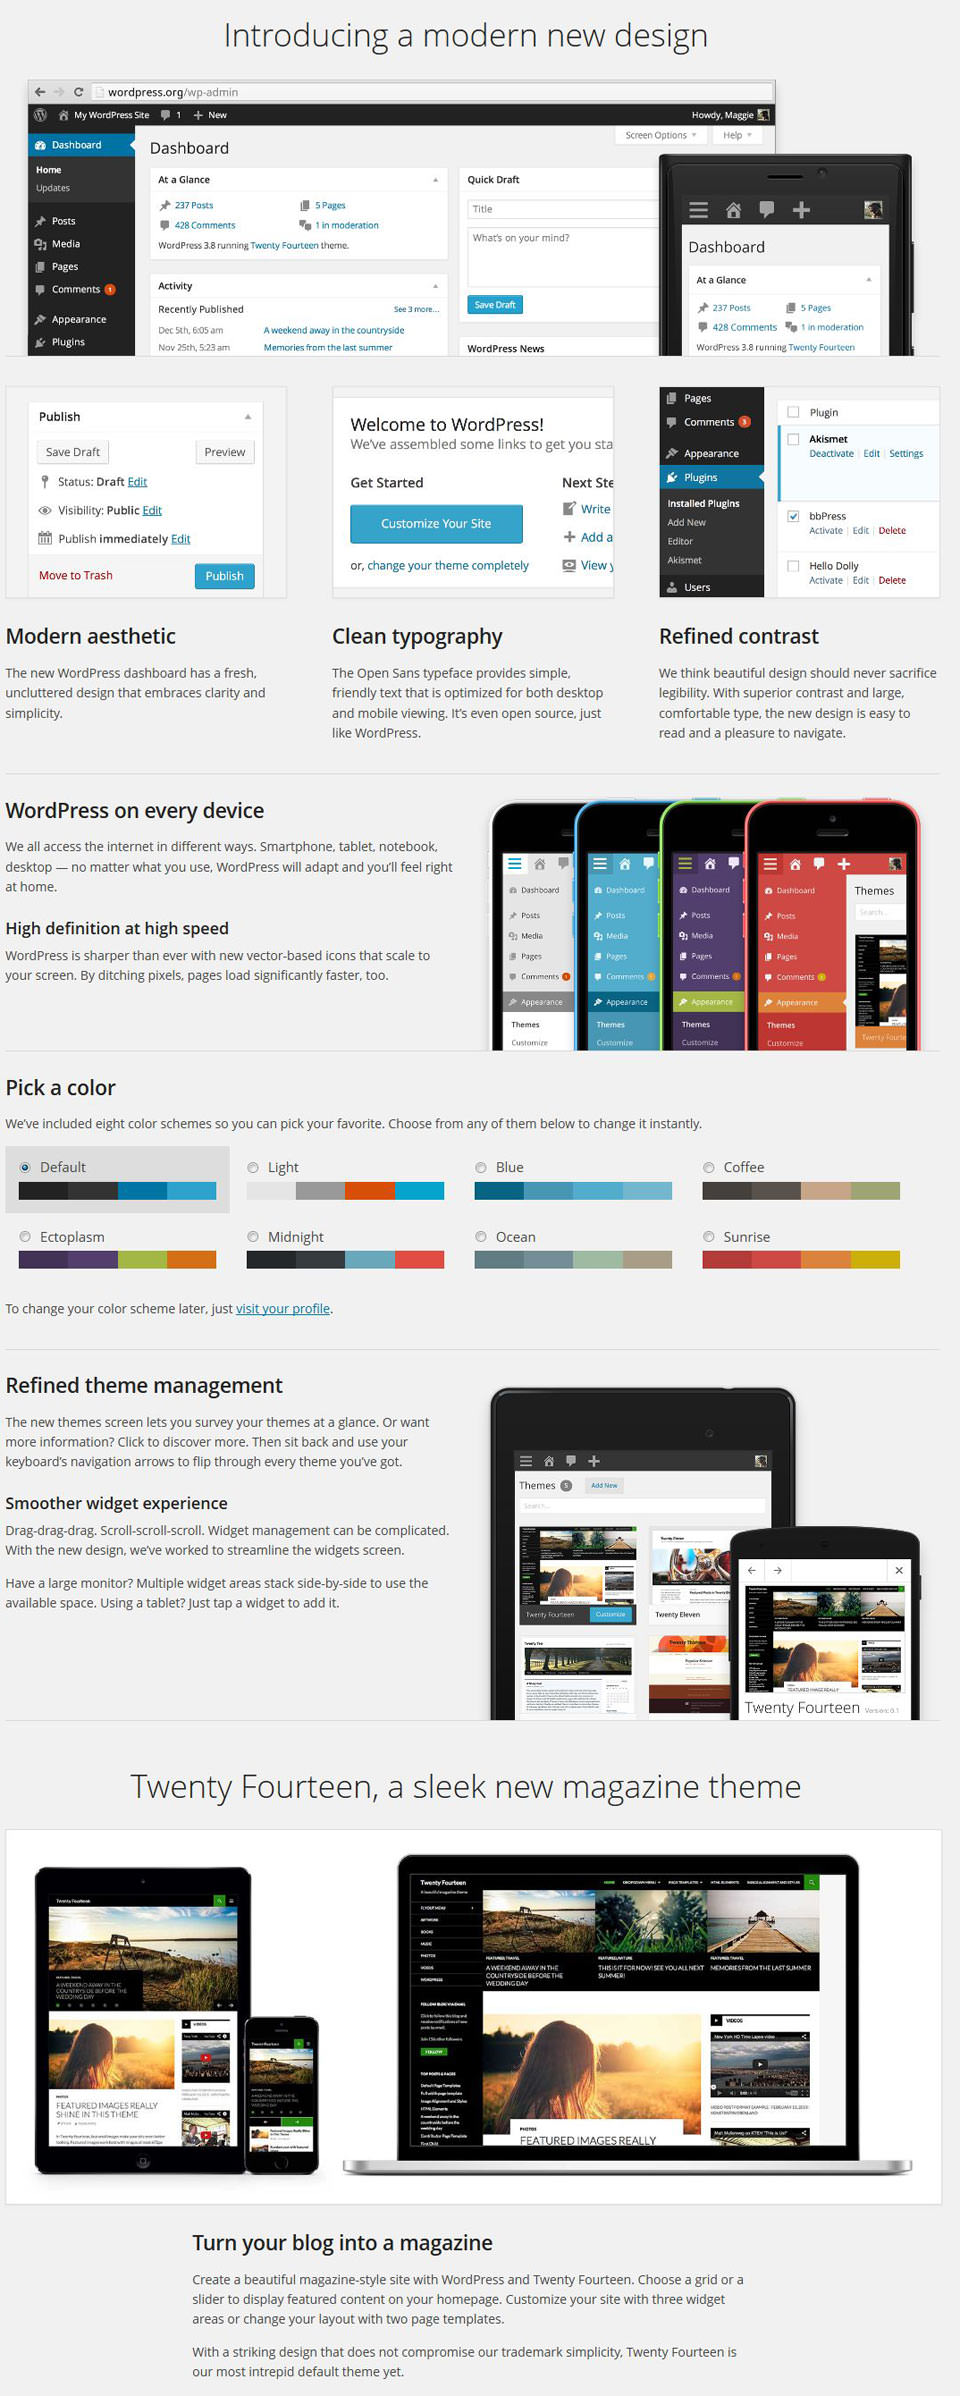
The update has given the back end a more modern feel and allows the user to choose from a variety of colored themes. Additionally, and probably most importantly, the back end now uses a fully responsive design which means you can edit your WordPress site on any device – iphone, ipad, Android, etc.
What Does this Mean for You?
Often when WordPress releases an update featuring a back end change people groan and complain and are concerned it is going to make things more difficult. With the 3.8 update, however, the changes are strictly aesthetic and you are not going to find missing menu items or rearranged dashboards. In general this should be a seamless update that only improves your overall user experience with WordPress.
You can find more information on WordPress 3.8 here.
If you are on one of our Maintenance packages your website has been updated to the latest version of WordPress.
Preview of WordPress 3.8 Updates: